Replacing a Macbook Pro 2013 Battery
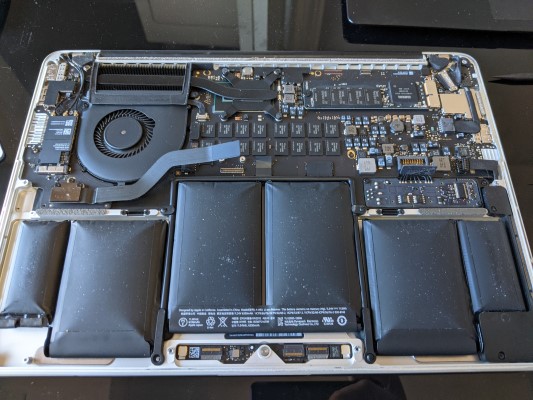
For a few months to a year I’ve noticed my Macbook Pro 2013 (13 inch), I’ll be using “MBP” from now on for convenience, not sitting right when in use. It turns out the lithium ion battery was enlarging over time due to use or some fault. I stopped using it for awhile because of it and instead handled some of my other computers instead.
This Winter I finally bit the bullet and decided to order a new battery kit plus back screws from iFixit. I used their products before for this other MBP 2010 (13 inch) that I had whose battery just wasn’t holding charge anymore. The huge difference between the batteries of both computers made me push off this task until now.
On the MBP 2010, you simply had to unscrew the backplate and you would have access to the hard drive, battery, and RAM chips, making it very easy to DIY your repairs. No adhesives involved or soldering.
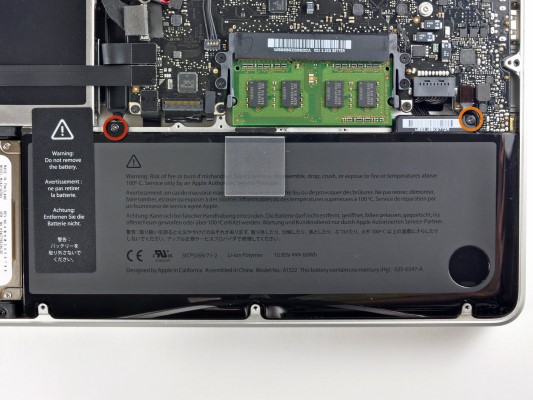
In contrast the MBP 2013 has the battery glued on and the repairer has to unhook or remove a few components to even get to it. In iFixit’s rating, the MBP 2010 batter repair score is a “Easy” while the MBP 2013 is a “Hard” and I totally agree. That being said, I’ve thankfully repaired a few things in my day already it didn’t turn out to be too bad.
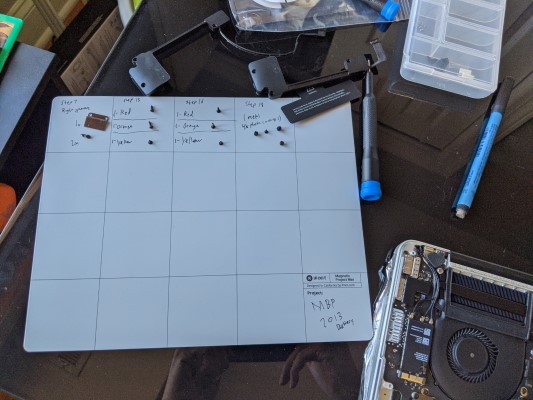
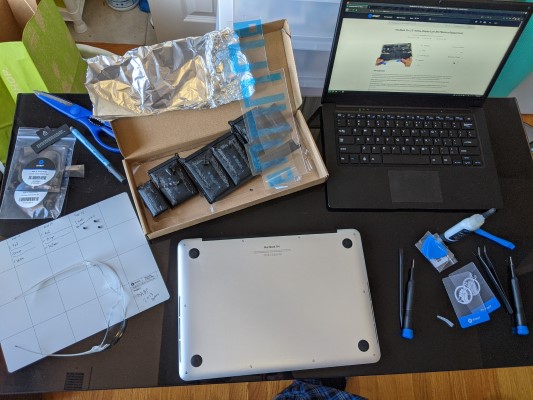
I also had this magnetized white board from iFixit (I know, I think I’m obsessed) to hold the screws and also write notes on. You can see how it didn’t end up being too many layers of screws to get through.
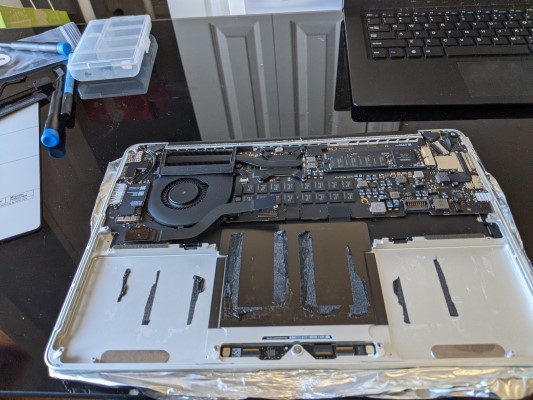
The hardest part was using the adhesive remover on the battery in order to melt out the glue. For each cell, I had to use a few drops and wait 2-3 minutes for it to take effect. I also had to prop the laptop up a at times in an incline so that the remover slides under the battery. I managed to do it without damaging anything like the track pad or keyboard. I also put in a bit more work to get rid of the leftover glue strips.
I wore an n95 mask throughout the process in case the battery exploded while in the spare bedroom with a window open and fan ready. I actually read more on how to handle lithium ion batteries and it’s best to have a bucket of sand or at least water nearby, and be outside. Since it was around 10 degrees out, I opted to be inside. In hindsight I should have probably sent it to a certified shop and let them handle it to be safe.
I’m happy I finished it with no incidents and I dropped off the old battery at a nearby Best Buy since they can handle e-waste. Apple really needs to curb their efforts in making their products anti-repairer. If I buy another Apple computer in the future I’d opt in for a Mac Mini since it has no battery. But for now, I can at least rely on this repaired laptop for any iOS/macOS related development.
Happy Holidays and be safe.